
How to install timber cladding
Installing timber cladding can add warmth and character to the exterior of a building, as well as providing protection from the elements. Here is a guide on how to install timber cladding.
How to install timber cladding
17 Feb
Installing timber cladding can add warmth and character to the exterior of a building, as well as providing protection from the elements. Here is a guide on how to install timber cladding:
Choose your timber cladding carefully, taking into account the style and appearance you want, as well as the durability and maintenance requirements. Softwood is a popular choice due to its affordability, while hardwood is more expensive but more durable. You should also consider the finish, such as paint or stain, and whether you want a smooth or textured surface.
Prepare the surface of the wall. Timber cladding should be applied to a flat, smooth surface, so any unevenness or imperfections should be repaired before installation. This may involve filling in gaps or cracks with filler and sanding down any rough areas.
Measure and cut the cladding to size. Timber cladding is usually supplied in long, pre-cut lengths, but you will need to trim it to fit the dimensions of your wall. Measure the width of the wall and mark out the length of the cladding on the back, using a straight edge and pencil. Cut the cladding along the marked lines, using a handsaw or circular saw.
Install a moisture barrier. A moisture barrier, such as building paper or a breathable membrane, should be installed behind the cladding to prevent water from entering the wall. This is particularly important if you are installing the cladding on a wall that is prone to damp or has a high risk of water damage.
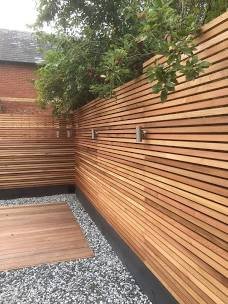
Install the cladding. Start at the bottom of the wall and work your way up, attaching the cladding to the wall with nails or screws. Leave a small gap between each piece of cladding to allow for expansion and contraction. Use a spirit level to ensure that the cladding is straight and level.
Finish the installation. Once all the cladding is in place, you can fill in any gaps with sealant and apply any desired finish, such as paint or stain. You may also want to install capping or trim around the top and bottom of the cladding to give it a neat, finished look.
Installing timber cladding is a relatively straightforward process, but it does require some planning and preparation. By following these steps, you can achieve a professional-looking result that will enhance the appearance of your home and provide long-lasting protection.


Get a quick turnaround quote from our timber cladding specialists:
Preserved Timber Products Ltd
Builth Road,
Builth Wells,
Powys,
LD2 3RG
Tel: 01982 553319
Fax: 01982 553911
Email: info@preservedtimber.co.uk
© Preserved Timber Products Ltd 2023, Company Registration No: 08146045. Web design in Mid Wales by PixelHaze